Downloading disabled

Monday, 28 October 2013

Some more portrait testing

Sorry I haven't posted in a while, life has got a bit hectic.  What with applying for and changing jobs and many busy weekends (mostly at weddings) there hasn't been much time for photography.  Something I hope doesn't become a habit.

Anyway, I think it was my previous post where I talked about using a speedlite/flashgun as a studio light.  Well I took the plunge and decided that I needed a second light set up and a light meter to help me out.  Whilst I didn't hate the photos I took I felt that I could get more consistent results with two lights.  Luckily this was something I had always planned to do, so when I originally bought the remote triggers for the speedlites I bought one that could trigger two lights.  This did bring the cost down when buying the second light, stand and diffuser.

As I had an old school friend visiting this weekend, I used the opportunity to get some snaps and here are some of the results.

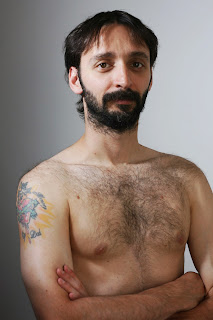
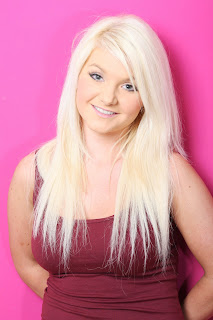
First of all we went for some standing shots:


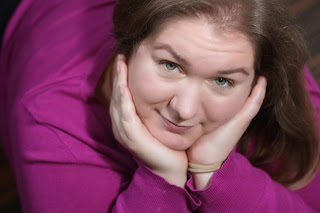
Whilst I wasn't too upset with the lighting, I did feel they felt a little awkward.  My beautiful model Beth did make the suggestion of leaning on something, which I felt the results were much better (if a little corporate at times)


And then we moved to sitting and lying on the floor.  This is definitely my nemesis as I really can't figure out the lighting


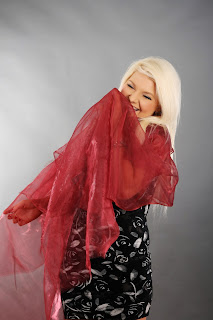
And finally I have a few arty shots.


I definitely think I am getting the hang of using lighting for portraits and did learn that I need to experiment with poses and what works best with which body shape.  I guess I have to rope more friends into modelling for me ;-)

Sunday, 14 July 2013

Home Studio

For quite a while this is something I have wanted, lets face it, how cool will it be to have a designated room in your home just for photography.  Well we have a spare room, but unfortunately it can't be solely a studio, that didn't stop me ensuring I had some matt white walls when we redecorated over the winter, leaving me a whole wall specifically for portraits.  After my studio day this got me wanting to get things sorted but actual studio lights are expensive, not only that you need light stands, diffusers, reflectors, sync cables or wireless remotes.  I think a budget set was mounting up to £500 eeeep.  This is where google became my friend.  I had previously tried this with construction lights but they are so hot and constantly on that it just isn't suitable.  One of the things I learned on my studio day, so speedlites or flashguns are the next option.  I think my set up has cost £100 but as a start I am happy.  I have a Yungnuo Spedlite, wireless transmitter, so I can trigger the flash from my camera but whilst it's on a light stand and a diffuser,  I opted for the wireless transmitter that allows me to have a second flash, even though I have only bought one at the moment.  I personally bought all of mine from Amazon.co.uk, but I'm sure you could get it all from eBay for the same kind of price.  The speedlite came from Hong Kong and was quoted as 20 day shipping and arrived in 1 week, so no complaints there.

Anyway, my first attempt was not so successful, I was hot, bothered and fed up that it did not come as easily as it did in the proper studio, so I took some time out, read up on google and had another go.  I learned that unless you want lots of shadows, the model has to stand away from the wall, this should have been obvious but hey ho.  Also the light needs to be closer to the model than the wall.  As I am keeping the curtains open, which are on my right, the light was best placed on the left.  This is not what I originally thought, but it's always good to experiment.  Today's testing was really to see what settings get the best result.  Now I don't really understand the settings on the speedlite too well.  I set the zoom to 50mm as I was using a 50mm lens.  I have no idea if this is actually correct but it seemed a good start.  As for the flash amount, I think I opted for the least amount of light at 1/128.  Next came the actual camera settings, I opted for ISO 200 and an expose of 1/200 and then took a photo with a different f/stop.  As a side note, some more expensive speedlites you can control all the settings directly from your camera, as I have no issue with manual modes I was happy to save a little money and not care about setting it on the actual speedlite.

Anyway I had some interesting results.

Here is one with my willing (ish) model with an f/stop of F1.8
As you can see the flash of light is coming from the left and it is clear on Stav's face.  I continued to take photos but with changing the f/stop and the background got darker.  Here are a few examples.


As you can see the photo gets darker and darker.  I actually think this is quite cool as it means I can experiment with some darker moody ideas without needing a backdrop.

I did try adjusting some of the flash settings and some of them were way way too bright and I definitely need more time up there experimenting at different times of days.
This wasn't even the brightest setting.

As the room is really hot and the speedlite eats batteries we stopped here.  I have been recommended some rechargable batteries that work well with the speedlite and a charger for £15, so I think when I next get paid I might need to invest in that.

Sunday, 30 June 2013

Making a cardboard lightbox

One of my many issues with trying to take photos at home and usually of an evening is that I find I am not happy with the light.  From a bit of google and blog searching I discovered I could make what is called a light box from a cardboard box and just a few other items.  I could have bought a light tent but then that wouldn't have been a budget option.

So to start, you need a cardboard box, some tracing paper (A4 size), some stiff white card and some desk lamps.  All items are very cheap to get hold of and the most expensive item was the lamps, although I don't think I even spent £20 in total.

 When I went to my local craft shop (Hobbycraft) I couldn't find any A4 tracing paper and I only needed 3 sheets so I opted for an A1 sheet which my wonderful model, Stav, is folding and cutting for me.

 We then cut the top and bottom flap off from the box, but left the left and right ones on so that there was a little light hood there.
 Next was to cut out 3 holes/windows, one on each side and one on top.  They need to be smaller that the A4 sheets so we can tape the sheets over the holes on the outside of the box.
 Now it's time to attach your white card, it's needs to be quite thick but I don't think my sheet was long enough.  I sellotaped it to the inside of the box but so that it overhung it doesn't quite reach the top of the box.  Luckily this is something that can be changed at a later date.
 I just got a couple of cheap desk lamps and placed them outside but shining through the tracing paper.  A light can also be placed through the top window too.  It's entirely up to you.  The idea is that the tracing paper diffuses the light.  And as you can see the object you want to photograph is placed inside.
 And voila!  Ok I need to look at my white balance and play a bit more, but the sky is now my limit.
 Oh and when you are done you can roll up the white card (which is still taped on the inside) and store the lamps inside the box too.


Now as I stated at the start I didn't create this invention, I used other sources so please feel free to check out their blogs too:

LeavesnBloom
Jay Grice
Photo tuts

Wednesday, 19 June 2013

Macro lens - to buy or not to buy, that is the question.....


I have mentioned before that I really like photographing flowers, but there is only so far you can go without a macro lens before all the shots look similar.  However, what macro lens should I go for?  They are expensive and will I make use of it if I buy one?  I assume these are questions that people other than myself ask.  Well due to being on a budget I decided to look into macro extension tubes and managed to pick some up from Amazon for £7.99.  They had good reviews and well if I don't use them much then at least I haven't spend hundreds of pounds.

 So here they are, they just look like a lens but actually they aren't.  The most common way to use them is to place them on the body of your camera and then attach your lens to the other end.  You will find (which I had already discovered from my research) that the auto focus on your lens will no longer work, this is because the lens is not actually attached to the camera, so you will need to manually focus.  The other problem I noticed was that I needed the camera on a tripod to keep it quite steady.

I decided to use all the extension tubes but you can seperate this bundle and only use the ones you want.  I feel that I will need to do a lot of experimenting as whilst I don't hate my results they are not as great as I expected.  I attached these to my 50mm prime but maybe this wasn't the best lens or maybe as I have played in the evening that the light was not as good as it could have been, or maybe I really am not good at manually focusing........


I am not going to let non perfect results hold me back though and will continue to see if I can figure out how to get good results from extension tubes and report back at a later date.

Saturday, 1 June 2013

Studio day

In my bid to learn more about photography and to learn to take portraits I saw a course advertised on facebook from a local photo studio.  It was a half day lighting course for £39.  Whilst I might not have lots of cash to waste I figured actually getting in a portrait studio for that price and being taught the basics wouldn't be a waste and I was right.  

Before the day I had no idea what strobe lighting was, I had heard the term but it have never been clearly explained on the internet in my opinion. Basically it is a light that is synced up to camera and only flashes when you press the shutter on your camera.  This is apparently better than having a contionuous light source as most portraits people move about and it saves on the electricity bill.

So my DIY idea of construction lights really aren't gonna cut it as they are continuous.  I also learned about soft boxes and reflectors too, which are things I don't have at home either, so time to get saving.

Anyway, to start we had our model against a white background, the initial set up was with 2 lights with soft boxes pointed at her and then 2 more lights with reflectors behind her and pointed at the white wall.

I definitely need some work with the white wall thing, which is not an issue as I have white walls at home.  I think it is a little blown out.  I have adjusted the exposure in photoshop but this was a day about learning not getting it perfect first time.


 I really liked this shot but it was a lesson in keeping an eye on the background as you can see the light on the right hand side.  I'm sure I could crop this though.
 As well as learning about lighting we also had to pose the model, which is definitely something I need to work on and I found every chair pose quite awkward, but I kept snapping away until I found a pose I thought worked.
Next we moved on to a grey back drop and to start with just one light with soft box, this was to give a slightly darker tone and see how the shadows lie.


 After liking this effect, we added another light with reflector high and from the back right of the model to highlight her hair more


 And then finally we move the light with reflector to low and behind the model and facing the backdrop.  Whilst this is quite a cool effect, I personally felt it was a little dated.
So time to go back to a white background but with the model right up against it and sitting on a white box.  I confess I can't remember the lighting set up as we have been there a long time by this point.  I'm not overly keen on any of these, I found it quite awkward and well it's impossible not to get shadows, but here are my favourite of the ones I took.


Now getting to the more exciting stuff we move to the pink wall, this was interesting as all 3 of us on the course were getting completely different results from the lighting, there were lots of experiments between having just one soft box or 2 or 1 softbox with one reflector.  Most of mine are either with one soft box pointed at the model only or one soft box pointed at her and one reflector pointed at the wall.


Probably the most challenging set up for me was next, it was with the model on the floor.  Due to having her on a rug we had to crop in quite close.

I didn't really like these shots so I suggested that maybe she lie on her front instead but as you will see I made some very rookie mistakes.  I didn't adjust the lighting, so her face is quite dark and I didn't notice that the backdrop was in the way, we should have unrolled really.


Now the last thing to do before we reviewed our photos was to get our model having more fun.  Back to the grey backdrop but as you can see we lighted it differently so it wasn't so dark.


Ok well thanks for sticking with this blurb, I hope you liked the photos and any constructive comments are welcome.  I know these aren't perfect but I wanted to share my journey so they are not meant to be perfect at the moment.

I'll be adding these photos to my flickr account as well if you want to see any of them a little larger